

What’s recorded
WiFi Signal Pro records the following events, whatever your notification settings:- Joins and disconnections, including a warning when a network is open or uses weak security.
- Roams to another access point on the same network. Every roam is recorded individually.
- Channel changes, when the access point your Mac is connected to moves to another channel. If it left a DFS channel, the event says so: the access point may have left it after detecting radar, so repeated changes like this can point to radar interference.
- Slower connections, when your Mac moves to a lower frequency band or narrower channel and stays there.
- Internet outages, when your Mac loses Internet access on the Wi-Fi network, and when it’s back.
- Internet tests you run, whether they finished, ended incomplete, or were stopped. The details of a finished test include its measurements and, when applicable, the message explaining that it used the other address family after connection problems.
- Low-signal episodes, when signal strength remains below -75 dBm, and when it recovers. -75 dBm is roughly where a Mac starts looking for a better access point to roam to, so History calls it the roam trigger. This threshold is fixed and independent of the one in Notifications settings.
WiFi Signal Pro can only record history while it’s running. To keep a complete record, turn on Launch at login in General settings.
Open History
Do one of the following:- In the popover, click the Show History button (a clock with a circular arrow) beside the gear icon at the bottom right.
- Click the latest connection event at the bottom left of the popover to open History at that event.
Read the History window
- Day bars: across the top, one bar per day kept. The height of a bar shows how long your Mac was connected that day, and a mark above it means the day had a disconnection or an Internet outage. Click a bar, or press the Left Arrow or Right Arrow key, to show that day.
- Timeline: the selected day’s chart, with a lane for each network your Mac was on. Each lane is split at every roam and channel change and shaded by band, lighter to darker for 2.4 GHz, 5 GHz, and 6 GHz; where there’s room, the band is also named after the access point. Internet outages and low-signal episodes are shown as spans, and stretches with no readings are hatched. Move the pointer over the timeline to see the readings for that minute.
- Event list: under the timeline, events grouped by connection, with the gaps between connections shaded. Each connection is headed by the access point it started on, with the vendor icon, and every roam is listed. Press the Up Arrow or Down Arrow key to move between events, Command-Up Arrow or Command-Down Arrow to go to the first or last, and Esc to clear the selection.
- Details: select an event in the timeline or the list to see everything recorded about it. For a roam, the details include the access point your Mac moved from; for a channel change, the channel the access point moved from. When the vendor database has a website for the access point’s vendor, click the vendor name to open it. Click Copy Details to copy them.
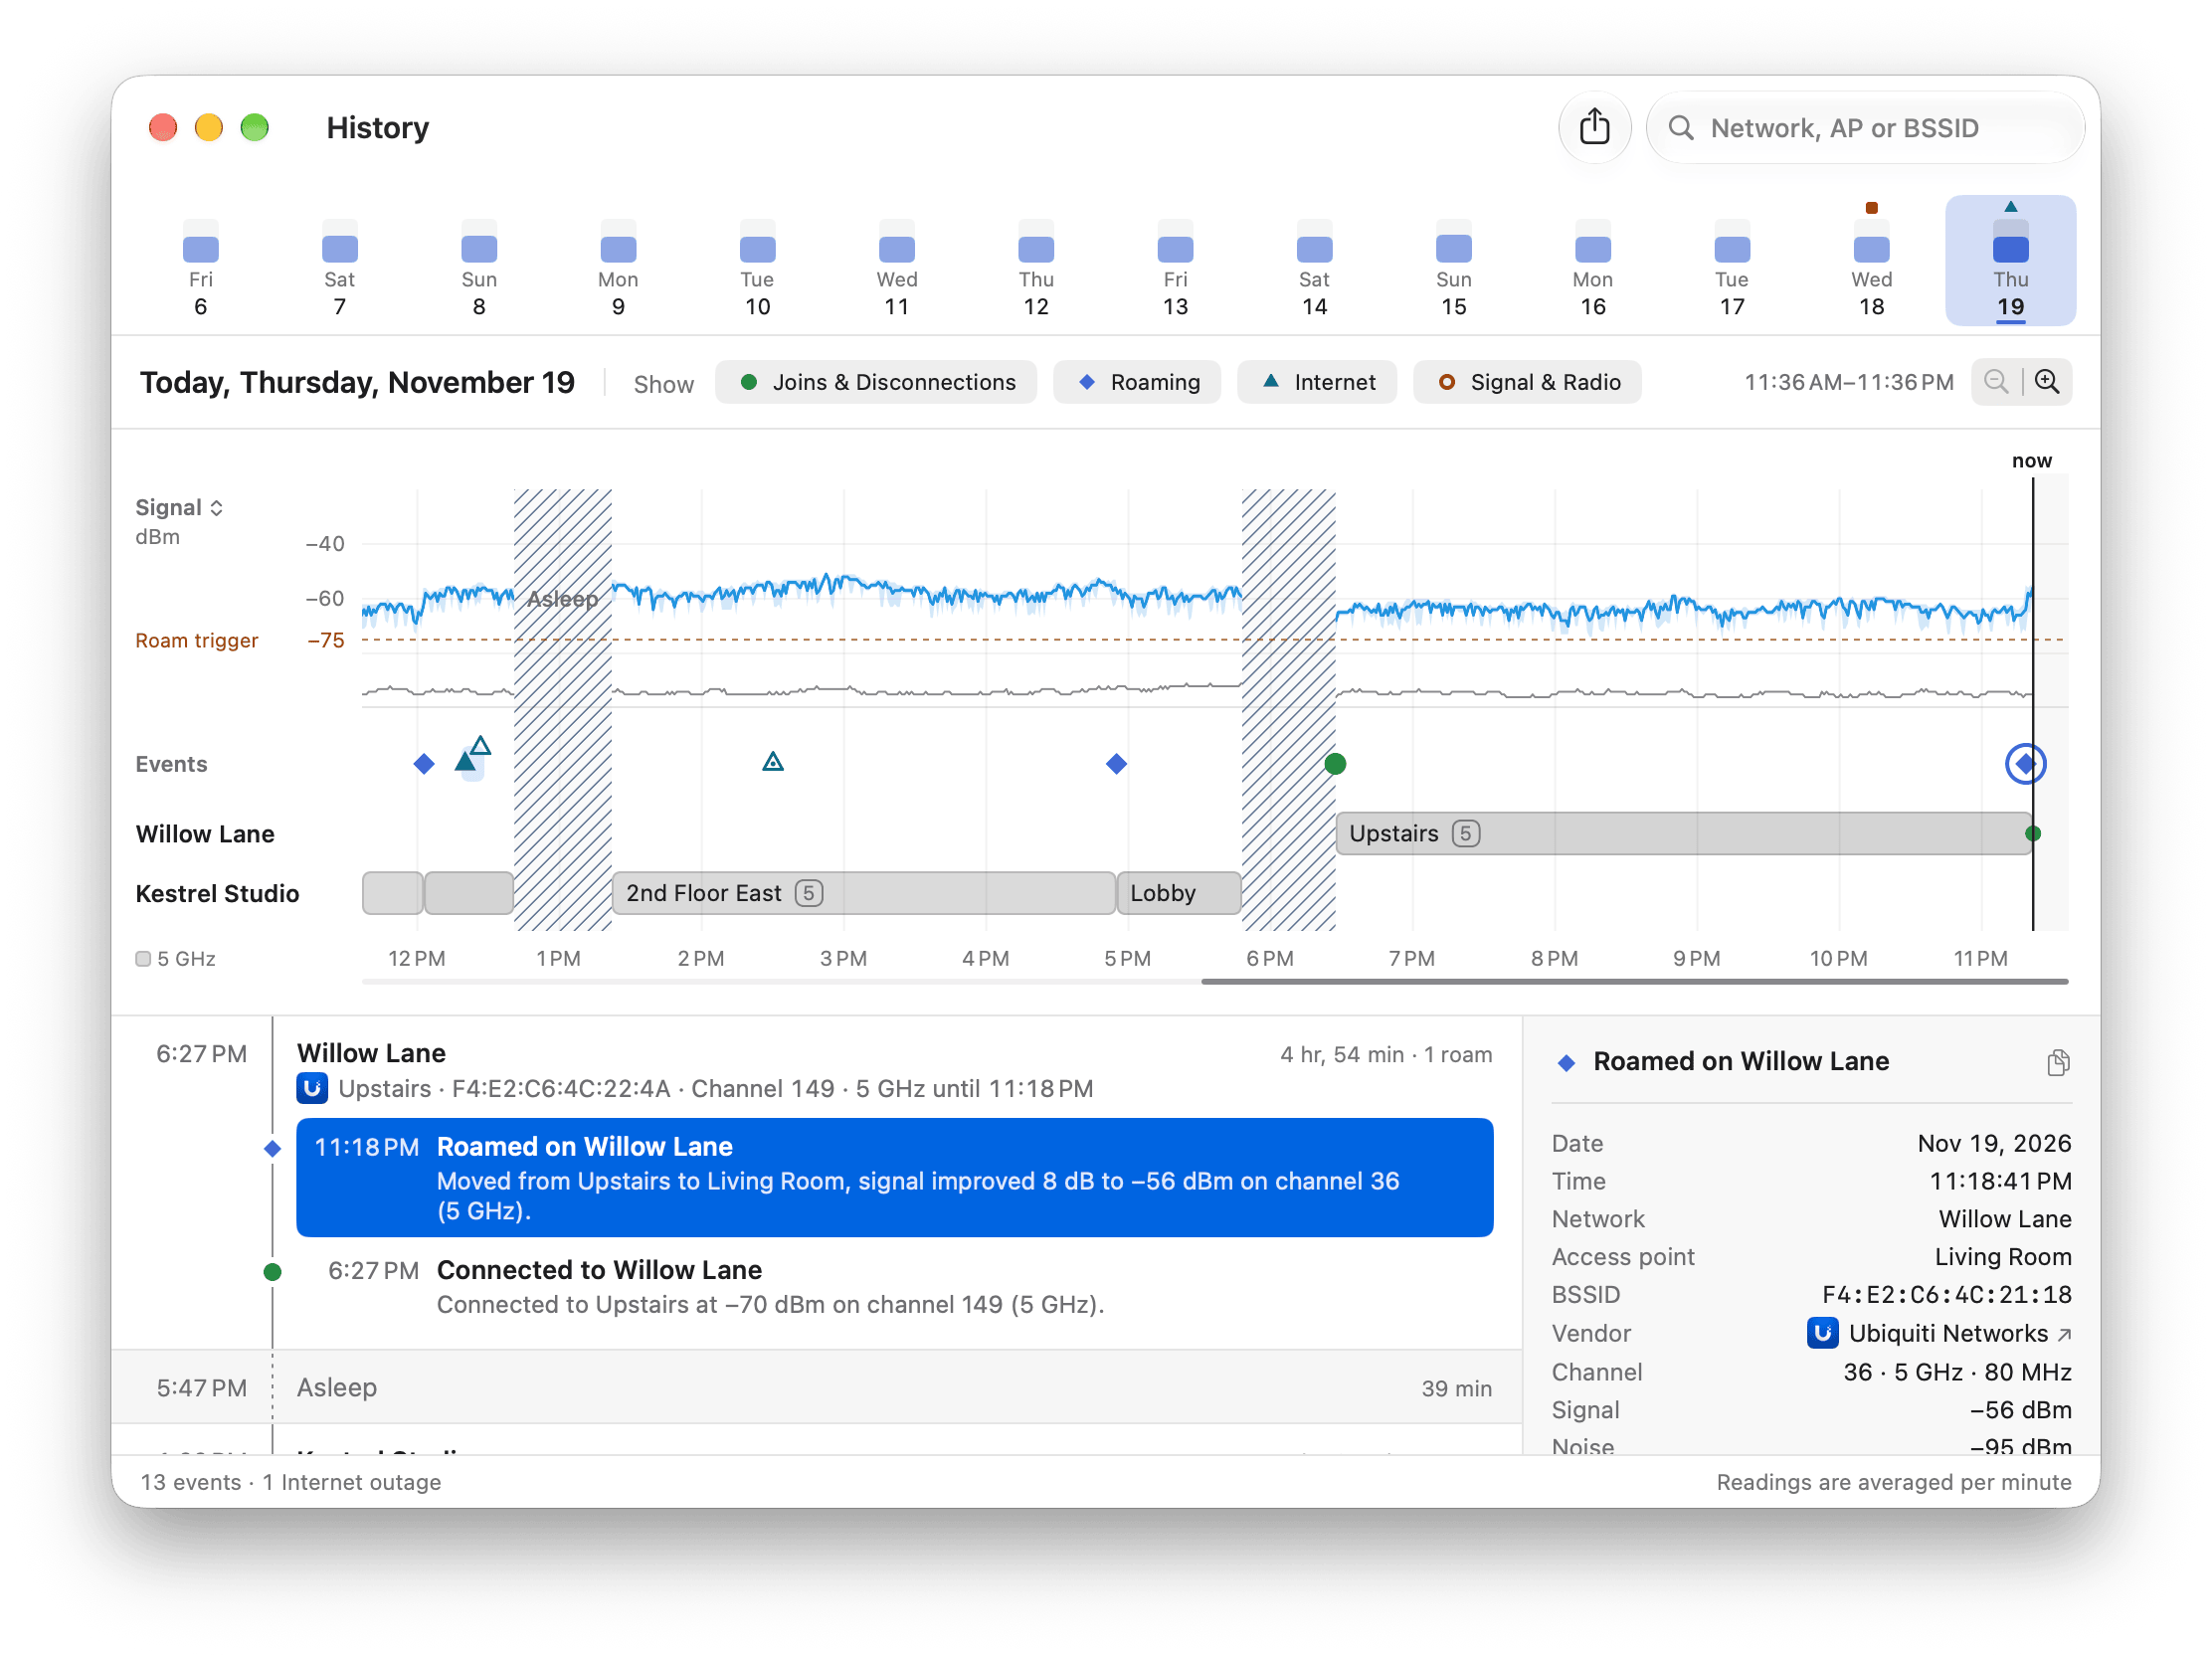
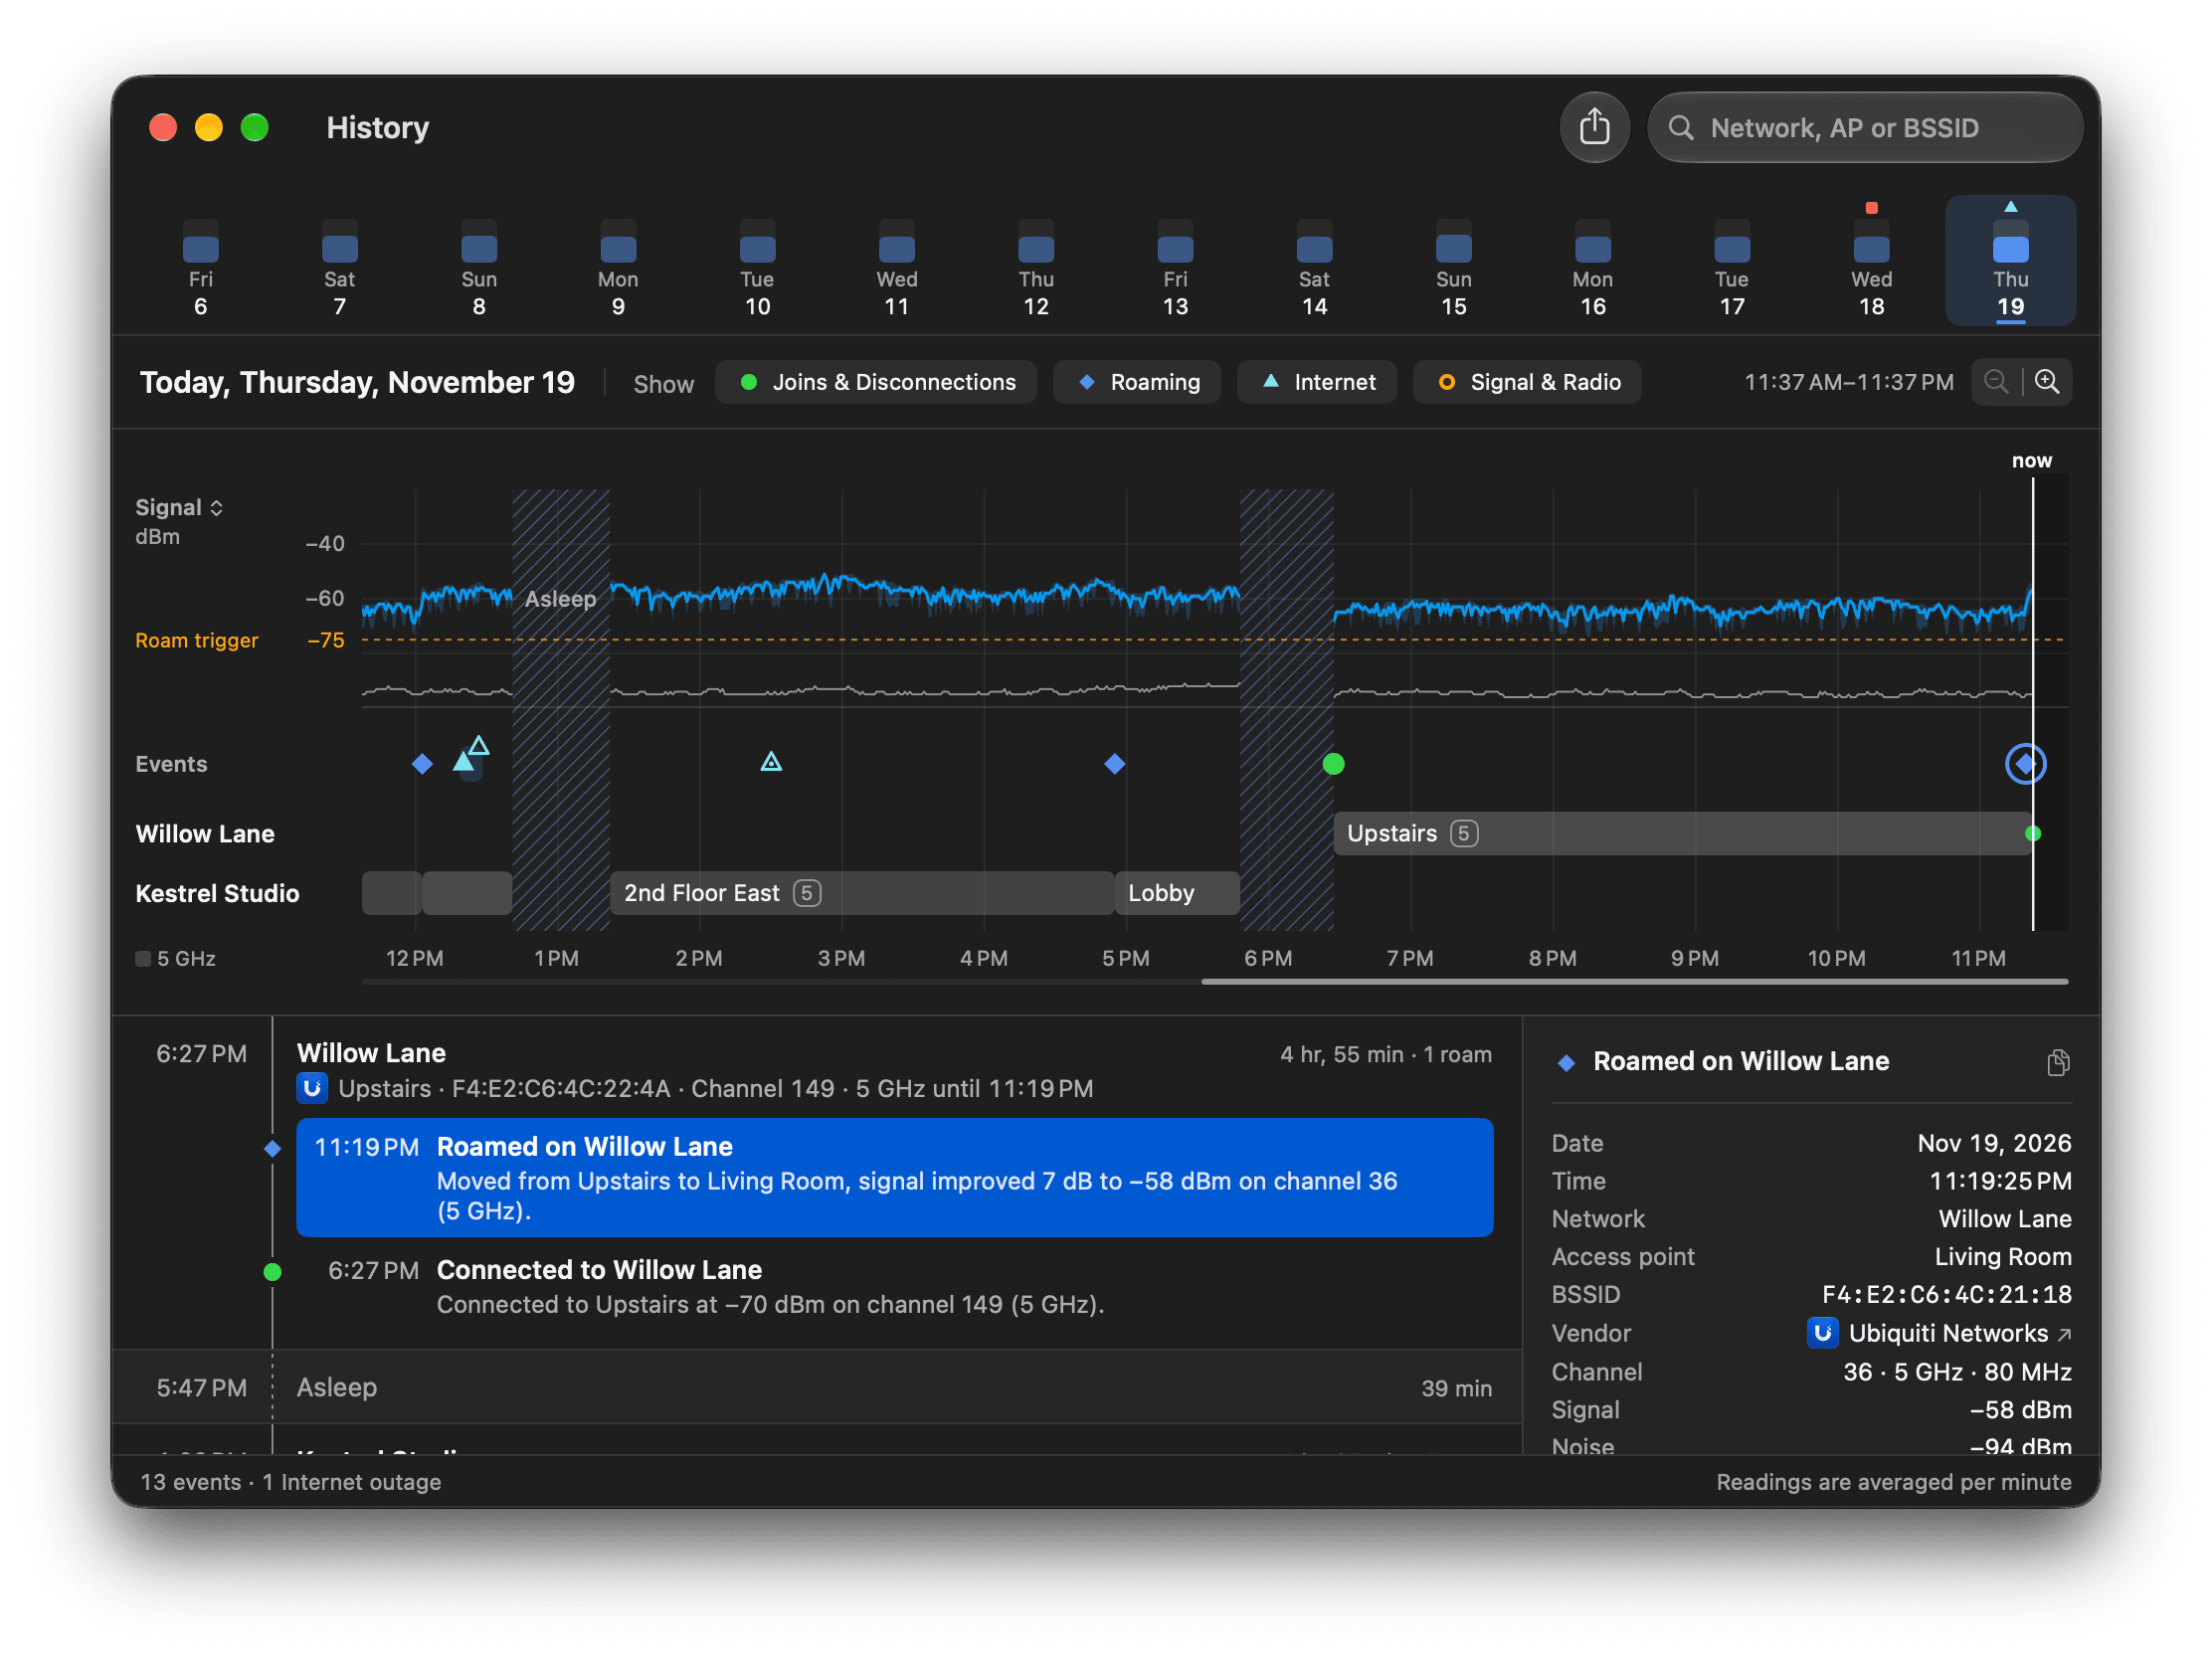
Today in the History window, with the latest roam selected and its details on the right.
Zoom the timeline
- Click the − and + buttons at the end of the day’s row, or press Command-Minus and Command-Plus. Option-click to zoom all the way out or in.
- Press Command-0 to show the whole day.
- Pinch on a trackpad, or hold Command and scroll with a mouse, to zoom around the pointer.
- Scroll sideways, or drag the scroller under the timeline, to move along the day.
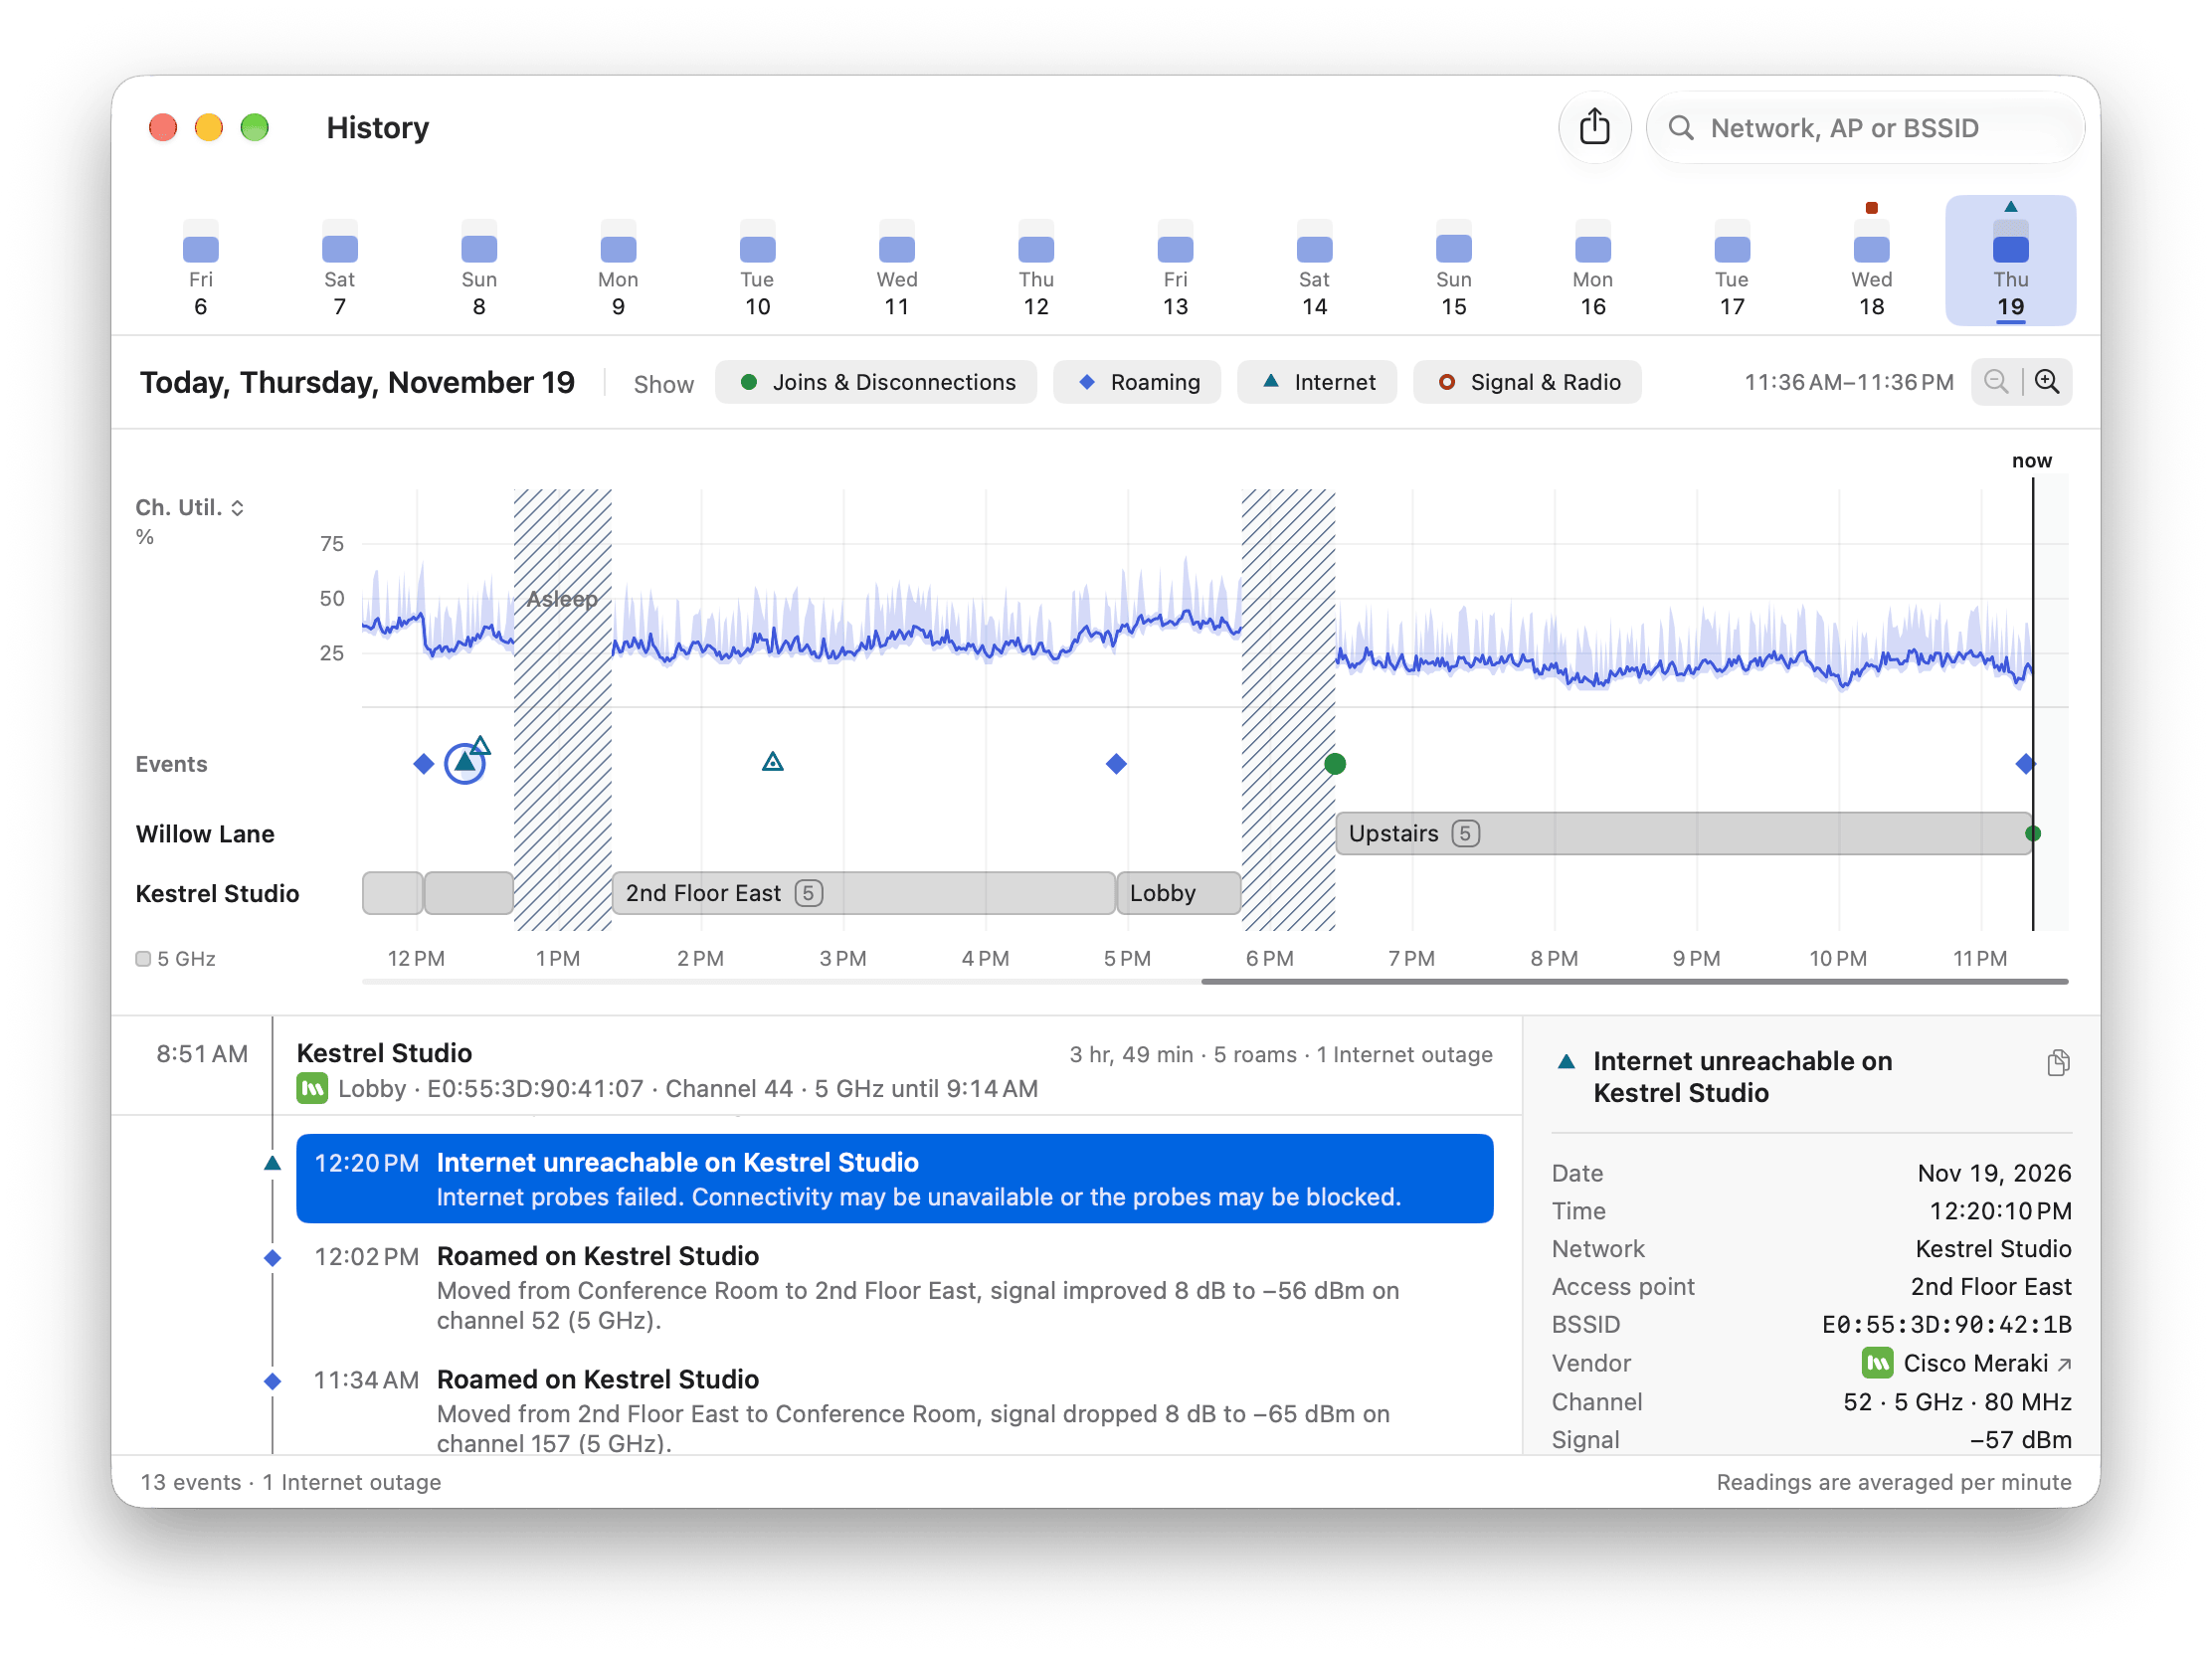
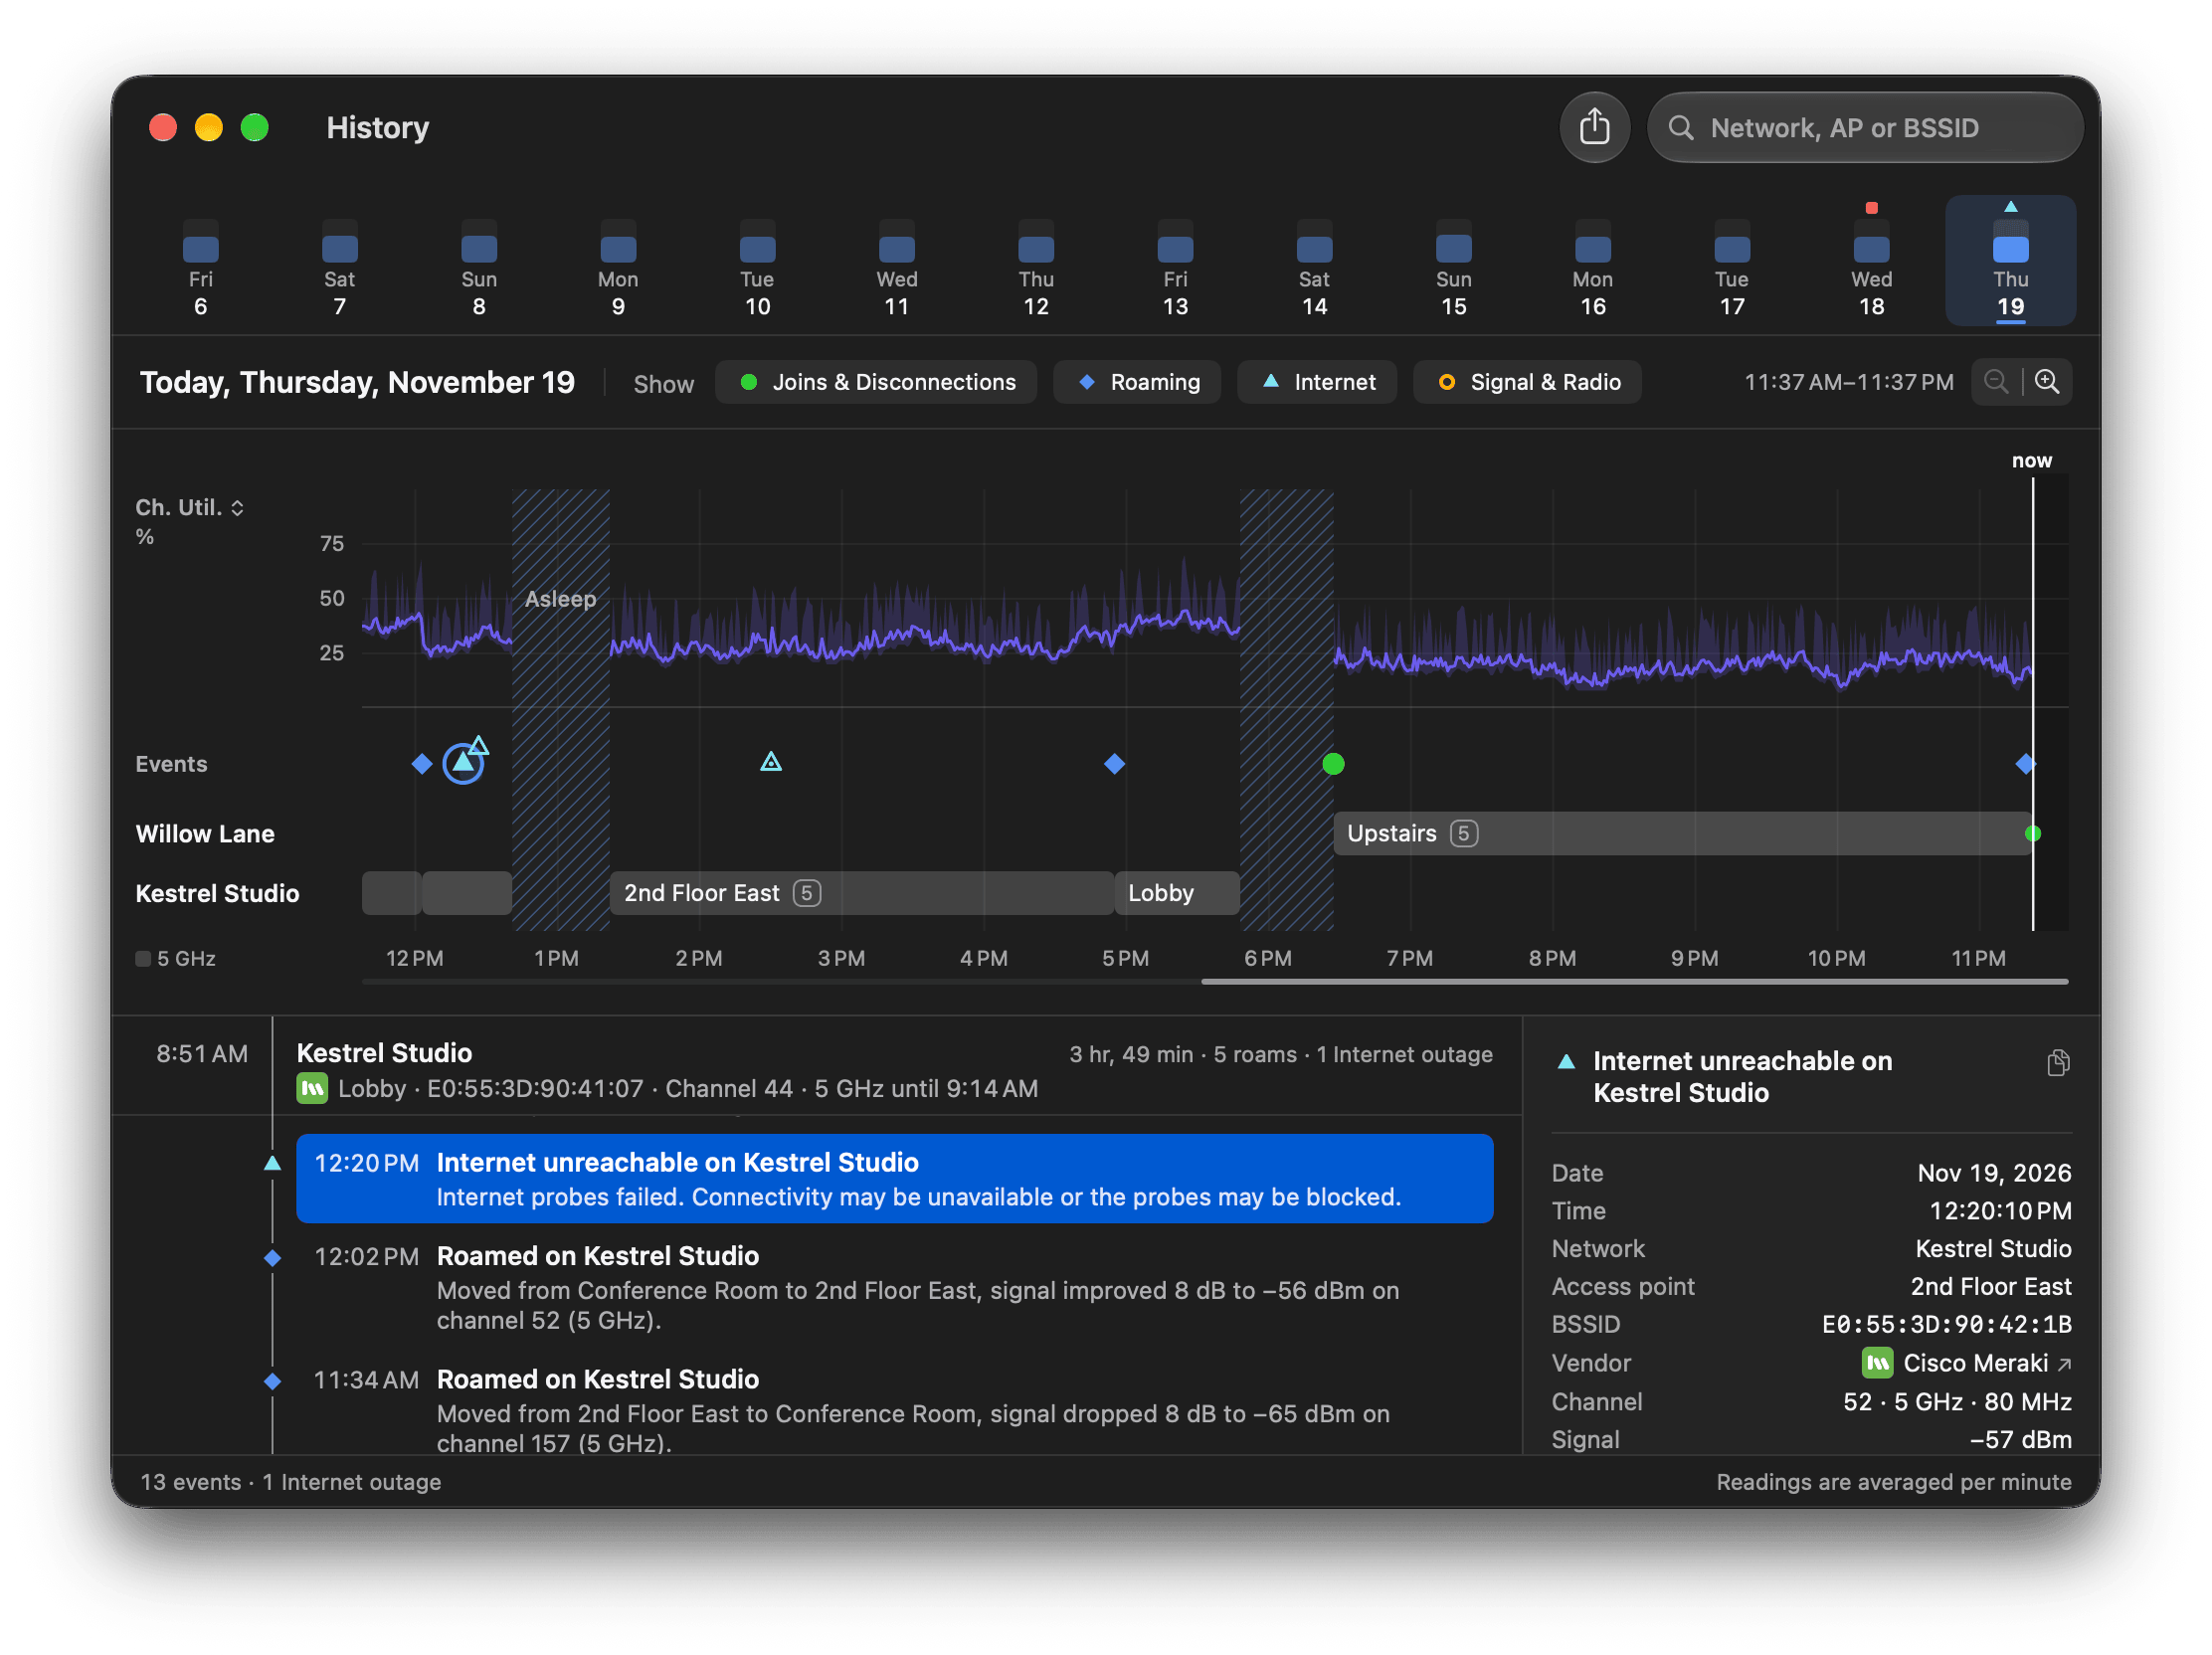
The timeline showing channel utilization, with an Internet outage selected.
Filter and search
- Click a filter, Joins & Disconnections, Roaming, Internet, or Signal & Radio, to show or hide that kind of event. Roaming includes channel changes, and Internet includes Internet tests. You can also turn filters on and off in the View menu, or press Option-Command-1 to Option-Command-4.
- Type in the search field to show only events that match a network name, access point name or label, or any part of a BSSID.
While Ignore personal hotspots is on in Notifications settings, events on iPhone and iPad hotspots are hidden from History.
Export history
You can export history to a CSV file.- In the History window, click the Export button in the toolbar, or choose File > Export… (or press Shift-Command-E).
- Next to Export, choose the selected day or the last 14 days.
- Next to Contents, choose one of the following:
- Events: one row per event, with the connection details at the time. For a roam or a channel change, the row also includes the access point, signal strength, and channel your Mac moved from.
- Readings per Minute: one row per minute, with the minimum, average, and maximum of each reading.
- Choose where to save the file, then click Export.
Clear history
- With the History window open, choose File > Clear History.
- Click Clear History to confirm.